Stage 5 (Rotating Faces) works as specified: +15 points BONUS.
So 50 points is a perfect score, but you may earn up to 65/50 points if you do the BONUS as well.
Stage 0. Study your goal.
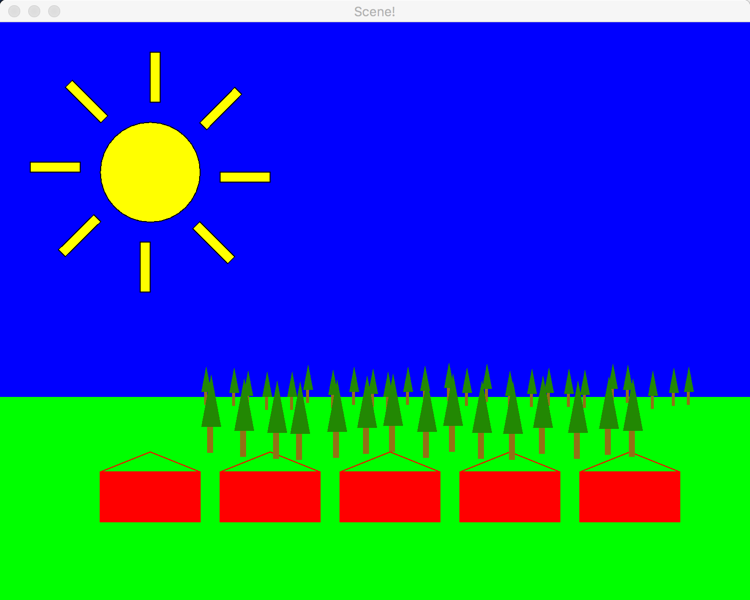
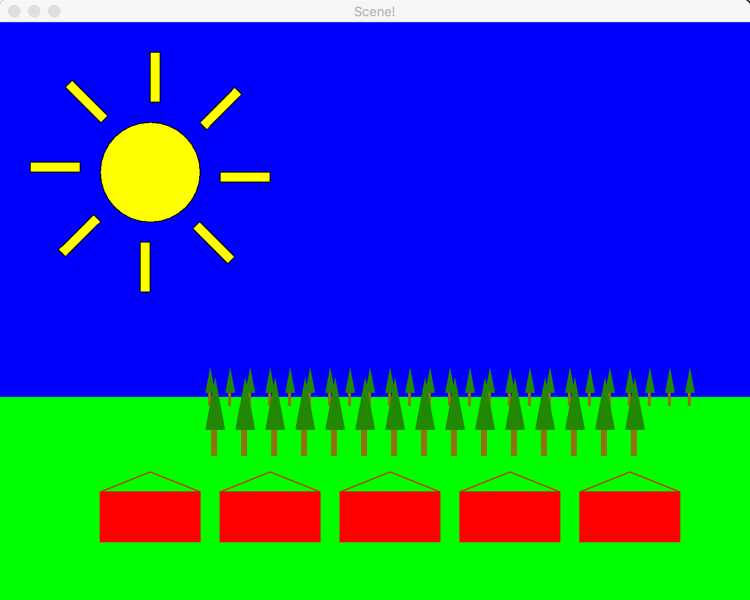
In the final stage, you will draw a scene consisting of some houses, trees, a sun, and the sky and grass in the background:
Houses Tress and Sun
You will draw the houses, trees, and sun in isolation, then put them all together.
Consider houses first. There are 3 classes:
A House class allows users of the class to specify:
The (x,y) position on the screen of the upper-left corner of the House’s body
The color of the House
A House can draw itself. It provides the following method to encapsulate that behavior:
/**
* Draws the House onto the given Graphics2D object.
*
* @param graphics2
*            Graphics object onto which to draw
*/
public void drawOn(Graphics2D graphics2) {
    <em>// ... code elided ...</em>
}
A HousesComponent class draws some House objects
A HousesViewer class constructs and displays a HousesComponent
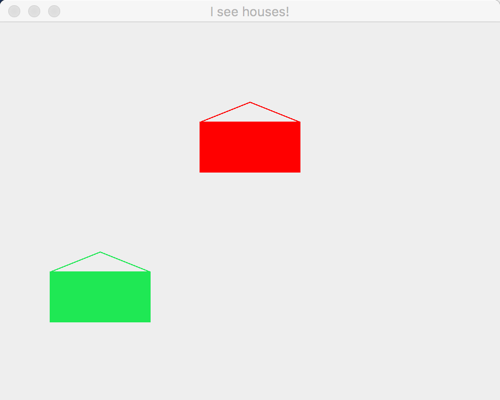
Stage 1. Houses
HousesAppear
You have been given the House, HousesViewer and HousesComponent classes.
House is only partially implemented
Implement the constructor.
Implement the drawOn(Graphics2D graphics2) method. You’ll need to fill a Rectangle and draw 2 more lines. As you’ll notice from the constants in the file, the house size is fixed: height = 50 pixels, width = 100 pixels, and roof height = 20 pixels. The (x,y) point given is the upper-left corner of the house body. So the y-coordinate of the top of the roof will be 20 less than the given y.
When done, running the HousesViewer should give an image like the one above.
Stage 2a. Create PineTreesViewer and PineTreesComponent
Add the PineTreesViewer and PineTreesComponent to your project
Right-click on the (default package) item under the src folder. Select New –> Class. Set the name to PineTreesViewer and select “public static void main(String[] args)”
Repeat the above, but name it PineTreesComponent, do not select the main method, and set the Superclass to JComponent
The PineTreesViewer size should be 500 wide and 400 tall.
Override the paintComponent method of the PineTreesComponent class.
Make sure to call the super class’s paintComponent method to make sure it does its work. Refer back to Stage 1 or the in-class work if you’re not sure how to do this.
Stage 2b. Creating the PineTree class
Before we start putting together a PineTree, here are some notes about how a PineTree is drawn:
Your constructor will take 4 parameters: x, y, width, and height.
The x and y values stored are the upper-left corner of an invisible box that bounds the tree. The width and height are of that invisible box.
The width of the trunk is 1/3 of the width of the box and its height is 1/3 the height of the box.
The height of the branches (the triangle) are 2/3 of the height of the tree and they take up the whole width of the tree.
The color of the trunk is brown = new Color(145, 112, 33) and the branches are green = new Color(40, 135, 22)
Create the PineTree class
Create a constructor that takes the 4 parameters specified above. Store the provided values in 4 private instance variables that you make.
In the PineTreeComponent’s paintComponent method, create a PineTree using the constructor, then draw it to the frame by calling the drawOn method. (Hint below if you get stuck on this.)
In the PineTree’s drawOn method, set the color to brown and create and fill the trunk using a Rectangle in the location given above.
In the PineTree’s drawOn method, create the branches in the location given above. The easiest thing to do it to draw 3 Line2D.Doubles. The only limitation is that you can’t fill lines.
If you want filled branches, you may instead use a Polygon (documentation here - basically, you put the x coordinates of each of the 3 corners of the Polygon into an array, put the y coordinates into another array, and pass them into the constructor). You fill it like any other shape: graphics2.fill(my polygon variable).
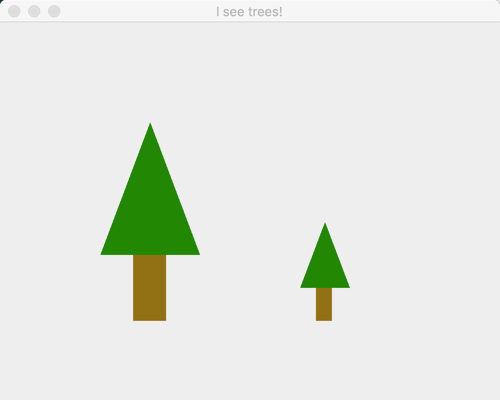
Then back in paintComponent, draw another tree, half as tall, and located to the right so that the bottoms of the trunks are aligned.
Finally, change your paintComponent to the following code for your final submission so that we can check that it looks like the picture below:
It should look like this when you run PineTreeViewer:
Some Trees
Stage 3a. Create SunViewer and SunComponent
Add the SunViewer and SunComponent to your project
Right-click on the (default package) item under the src folder. Select New –> Class. Set the name to SunViewer and select “public static void main(String[] args)”
Repeat the above, but name it SunComponent, do not select the main method, and set the Superclass to JComponent
The SunViewer size should be 750 wide and 600 tall.
Override the paintComponent method of the SunComponent class.
Place the following constants in the SunComponent class.
  private static final double LITTLE_SUN_SIZE = 30.0;
  private static final double LITTLE_SUN_SEPARATION = 100.0;
  private static final int NUM_LITTLE_SUNS = 5;
  private static final double LITTLE_SUNS_Y = 400.0;
  private static final Color LITTLE_SUN_COLOR = Color.RED;
  private static final double LITTLE_SUNS_X_OFFSET = 50;
Stage 3b. Creating the Sun class
Before we start putting together a Sun here are some notes about how a Sun is drawn:
The x and y values stored in a Sun represent the coordinates of the upper-left corner of the bounding box of the Sun’s center circle.
The space between the circle of a Sun and it’s rays is equal to 20% of the Sun’s circle’s diameter: (RAY_DISTANCE_FROM_SUN_SCALE)
The length of a ray is 50% of a Sun’s diameter: (RAY_LENGTH_SCALE)
The width of a ray is 10% of a Sun’s diameter: (RAY_WIDTH_SCALE)
The circleDiameter field is the diameter of the circle in the center of the Sun, not the entire size of the Sun.
Create the Sun class
Add the following constants to the Sun class:
 private static final Color BORDER_COLOR = Color.BLACK;
 private static final int NUMBER_OF_RAYS = 8;
 private static final double RAY_LENGTH_SCALE = 0.5;
 private static final double RAY_WIDTH_SCALE = 0.1;
 private static final double RAY_DISTANCE_FROM_SUN_SCALE = .2;
 private static final double DEFAULT_SUN_DIAMETER = 100.0;
 private static final double DEFAULT_SUN_X = 100.0;
 private static final double DEFAULT_SUN_Y = 100.0;
 private static final Color DEFAULT_SUN_COLOR = Color.YELLOW;
 private static final double LITTLE_SUNS_X_OFFSET = 50;
Add the following instance fields to the Sun class:
x - a double representing the x position of the upper left corner of the bounding box of the Sun’s center circle
y - a double representing the y position of the upper left corner of the bounding box of the Sun’s center circle
circleDiameter - diameter of the center circle of a Sun
rayLength - the length of each ray of a Sun
rayWidth - the width of each ray of a Sun
rayDistanceFromSun - the distance from the center of the sun to the beginning of a ray
color - the fill color for the Sun
Create a default constructor for the Sun class.
Use as many of the constants defined above as possible when setting values into the specified instance fields.
Create a constructor with the following parameters:
x - The upper left x value for the Sun’s main circle
y - The upper left y value for the Sun’s main circle
circleDiameter - The diameter of the Sun’s main cricle
color - The color to use to fill the Sun
Set the instance fields based on the values provided to the constructor.
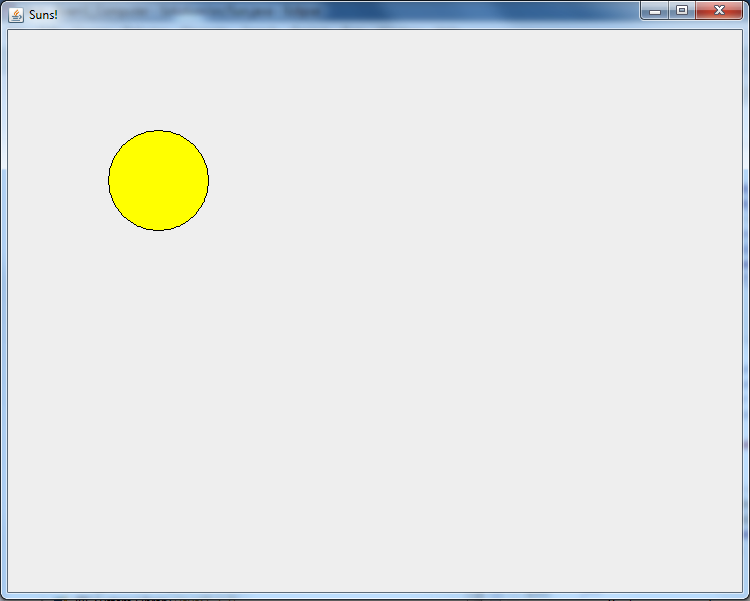
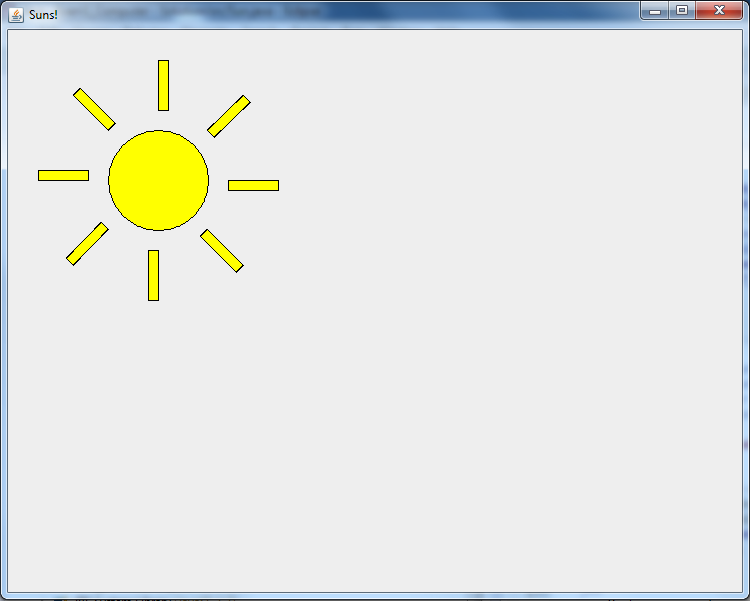
Stage 3c. Draw your first sun
Default Sun without rays
Default Sun without rays
Default Sun with rays
Default Sun with rays
In the SunComponent’s paintComponent method, create a Sun using the default (parameterless) constructor, then draw it to the component by calling the drawOn method. (Hint below if you get stuck.)
In the Sun’s drawOn method, draw the center circle for the Sun based on its x and y values and the circleDiameter.
Make sure to fill it with the Sun’s color
Make sure to draw the border with the BORDER_COLOR
Be sure to test it shows up correctly before you go on to drawing the rays!
Draw the rays in for the circle.
Create a drawRay method that takes a Graphics2D object and an angle can make things easier.
The drawRay method would be called in in a loop from the drawOn method in Sun
The Graphics2D rotate and translate methods will be very helpful when drawing rays (you may want to call translate in drawOn before you call drawRays)
Be sure to test that it shows up correctly before you go on to drawing a bunch more suns
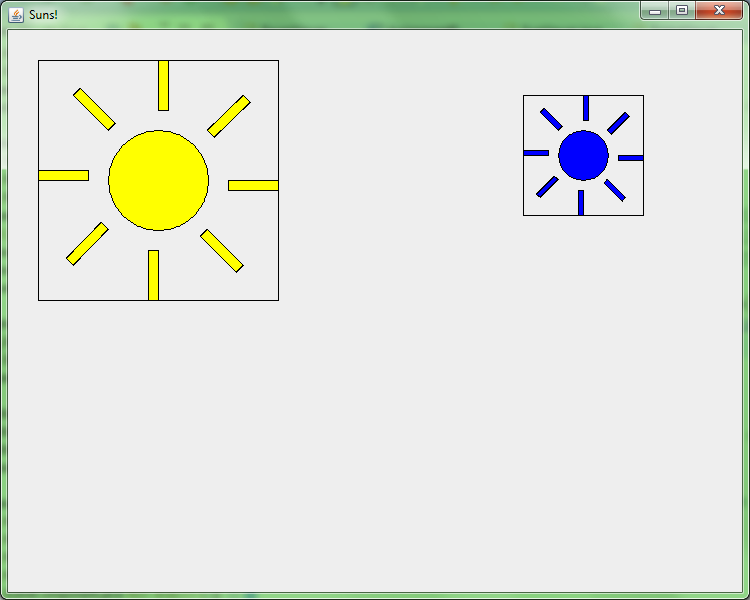
Stage 3d. Drawing more suns
With guide rectangles to verify sun positioning is correct
With guide rectangles to verify sun positioning is correct
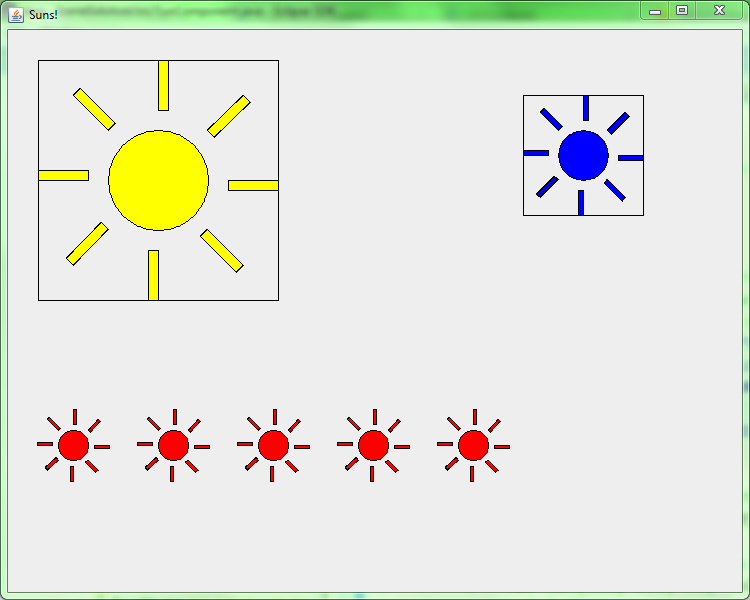
Adding little suns!
Adding little suns!
Test that your positioning is working properly. Add this code to SunComponent’s paintComponent method:
 //draws a rectangle around the default sun
 g2.drawRect(30, 30, 240, 240);

 //draws a rectangle around a new sun in a particular position
 s = new Sun(550, 100, 50, Color.BLUE);
 s.drawOn(g2);
 g2.drawRect(515, 65, 120, 120);
Don’t modify the parameters in the above code! If the Sun position and the rectangle don’t match, the problem is the way you are drawing suns!
Modify SunComponent’s paintComponent method to create multiple little Suns (use NUM_LITTLE_SUMS for the exact number), and draw them to the screen
The little suns should start at x = LITTLE_SUNS_X_OFFSET and should be separated by the amount in LITTLE_SUN_SEPARATION
The little suns should be drawn in LITTLE_SUN_COLOR
Use a for loop to do this! Don’t hard-code each sun individually!
It should appear as the item at the bottom of the figure.
For your final submission, make sure your paintComponent() do the following so that we can check that it looks like the final sun picture:
 @Override
 protected void paintComponent(Graphics g) {
     super.paintComponent(g);

     // Get the 2D graphics object
     Graphics2D g2 = (Graphics2D)g;
     // Create a Sun using the default (parameterless) constructor,
     // then draw it to the frame
     Sun s = new Sun();
     s.drawOn(g2);

     // Draw a rectangle around the default sun
     g2.drawRect(30, 30, 240, 240);

     // Draw a rectangle around a new sun in a particular position
     s = new Sun(550, 100, 50, Color.BLUE);
     s.drawOn(g2);
     g2.drawRect(515, 65, 120, 120);

     // Draw little suns
     double x = SunComponent.LITTLE_SUNS_X_OFFSET;
     for (int i = 0; i < SunComponent.NUM_LITTLE_SUNS; i++) {
         s = new Sun(x,
               SunComponent.LITTLE_SUNS_Y,
               SunComponent.LITTLE_SUN_SIZE,
               SunComponent.LITTLE_SUN_COLOR);
         s.drawOn(g2);
         x+= SunComponent.LITTLE_SUN_SEPARATION;
     }
 }
Stage 4a. Create the SceneViewer and SceneComponent
In this pat, you’ll put it all together!
Create the SceneViewer and SceneComponent using the same process as for Houses, PineTrees and Suns
There is no Scene class.
Set the frame size to 750x600
Stage 4b. Create Scene
Create a sky for the Scene by drawing a blue rectangle in the upper 375 pixels of the component.
Create grass for the Scene by drawing a green rectangle in the rest of the component.
Stage 4c. Finish Scene
Scene with trees
Add a Sun at the default location to the SceneComponent.
Create a row of red houses in the foreground, evenly spaced so that they don’t overlap, as shown. Loops are your friend!
Create a row of 25 little pine trees (10 pixels x 40 pixels) behind the houses on the horizon.
Create a row of 15 bigger (20 pixels x 80 pixels) in front of the first trees.
(Optional) If you want to make them look more natural, you can randomize the x and y coordinates of the trees by a little bit. That’s how I got the image at the top of this page. Your textbook has info on the Random class (or see the Java API, of course).
Stage 5. Rotatable Faces (BONUS)
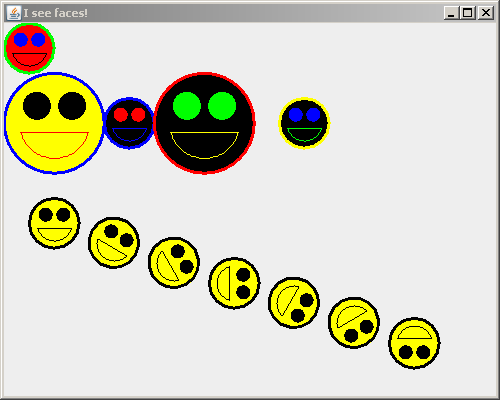
Translated and rotated faces appear
Create a Face class, FacesViewer class, and FacesComponent class.
The geometry on this one is more complex than the others, using an Arc2D.Double for the mouth. The Geometry of a Face" diagram gives numbers to use to construct the Face.
Draw some faces in upright position. They can be whatever size and color you like, placed wherever you like, as long as they test your FacesComponent and Face classes adequately for this stage (so use different positions, radii, colors, etc).
Implement a translate(double x, double y) method that translates the Face’s position by the amounts given in the arguments.
For example, in the picture, the downward slanting line of yellow Face’s (which each have radius 25) have been successively translated by (55, 20).
They have also been rotated, but wait for the next step for that.
All that translate does is change the coordinates of the Face. You have already written the code that displays the Face at its (translated) position. Implementing this is just 2 new lines of code!
Translation is not animation; don’t expect any animation here (although one could add animation, and you WILL do so in a forthcoming project).
Implement a rotate(double angleToRotate) method that rotates the Face by the number of degrees given in the argument.
For example, in the picture, the downward slanting line of yellow Face’s (which each have radius 25) have been successively rotated by 30 degrees.
All that rotate does is change the field (which you must add) that stores the number of degrees to rotate the Face.
Unlike translate, you have not yet implemented rotations of the Face in your drawOn method. But this is easy to do — 2 new lines of code in drawOn are enough to rotate the Face by the value stored in its degreesToRotate field.
Test your rotate method by calling it inside a loop in FacesComponent.
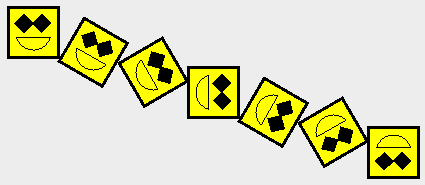
Square FacesGIGANTIC HINT!!!! The face itself and each eye is currently a circle created using Ellipse2D.Double. It’s difficult to see whether you’re rotating a circle correctly! So, you may wish to temporarily change your code to draw squares instead. The constructor for Rectangle2D.Double takes the same arguments as the one for Ellipse2D.Double, so you can just switch to squares until you get rotation working. Be sure to switch back to circles before your final commit!