All the remaining CSSE220 individual assignments, including exams, that require electronic submission, will be posted to your individual git repository. To access these assignments, you’ll want to use Eclipse to clone (that is, copy) the repo onto your local system.
Login to https://ada.csse.rose-hulman.edu using your Rose-Hulman network username and password. Click on Projects > Your Projects to see a list of your projects. Click on the project with a name that looks something like this: csse220-XXXXXX-student-initial-Group / csse220-XXXXXX-student-initial-YYYY where XXXXXX represents the term code (e.g., 201930) and YYYY represents your Rose-Hulman username.
To get the URL for your repository, expand the SSH dropdown list to see the HTTPS option. Select that option. You will see a URL that begins with https://ada.csse; that’s your repo URL. Click on the icon immediately to the right of it to copy your repo URL to the clipboard. Now follow the instructions below to clone your repo in Eclipse.
Start Eclipse
Go to “File > Import” in the menu
Select “Git > Projects From Git” from the list of options and click “Next”
Select “Clone URI”
Paste your repo URL (copied to the clipboard, above) in the URI field and click “Next”
Make sure master is checked and click “Next”
You can choose any directory you like as your destination. You’ll be able to use this directory to access a local copy of all the individual assignments, so pick a directory you’ll remember.
Choose one and click “Next”
It’ll take about a minute, or less, for the repo to download.
Make sure you select the radio button “Import existing Eclipse projects” and click “Next”
If you see one or more new directories in the left pane it worked!
If you are running a version of the Windows operating system, install Git for Windows by following these steps:
Download Git for Windows, 64-bit exe file to your laptop
Double click the downloaded file to install Git on your system
[OPTIONAL] Steps To Add Git to Powershell
Add the installed directory to your system path environment variable by following these instructions.
Verify your installation by opening up PowerShell and typing
git --versionNote: that’s 2 dashes
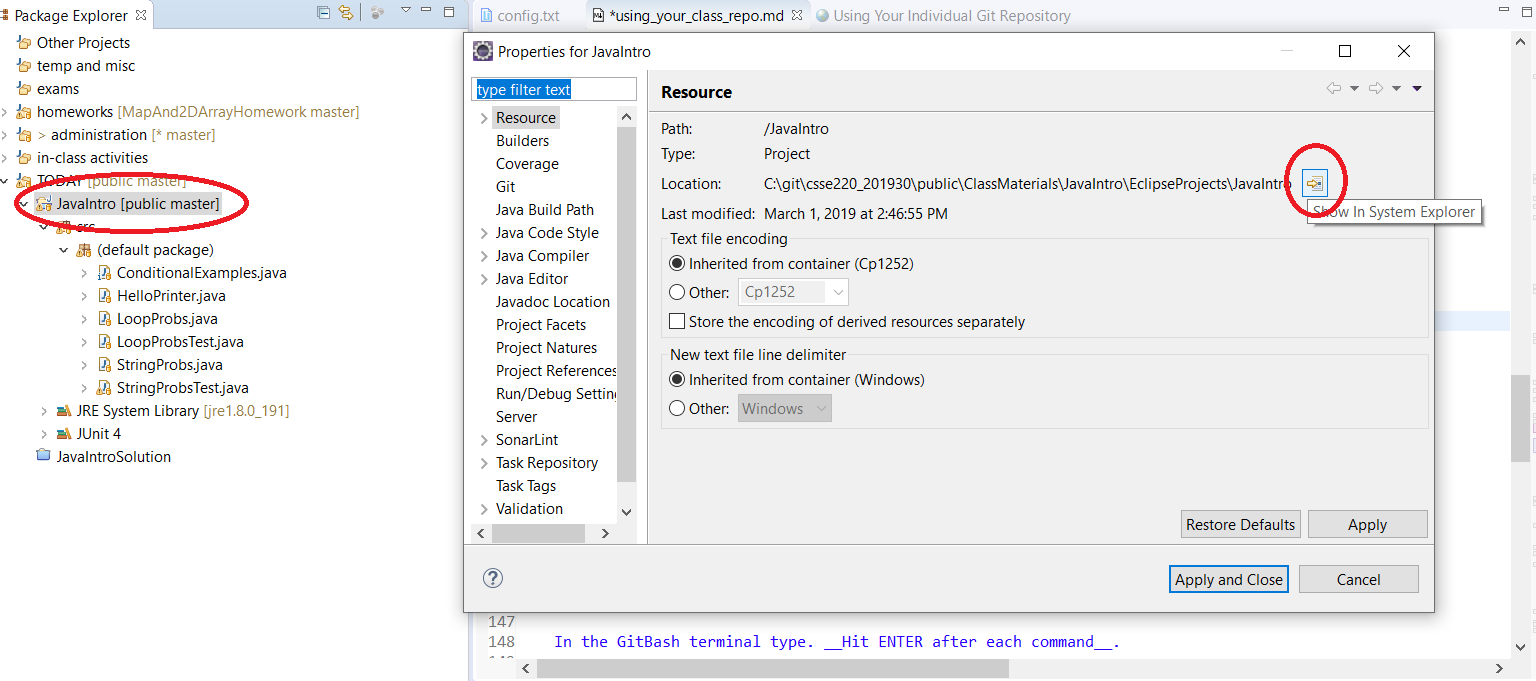
Important We will be posting assignments and grader feedback throughout the term. To ensure you have the latest assignments and feedback, right click on your newly cloned repo (or last imported project from that repo) and select “Properties”.
In the Resources pane you will see the location on disk where your repo (or project) is saved. Navigate to that location using Windows Explorer, right click on the directory name (of the repo) and select “GitBash here”.

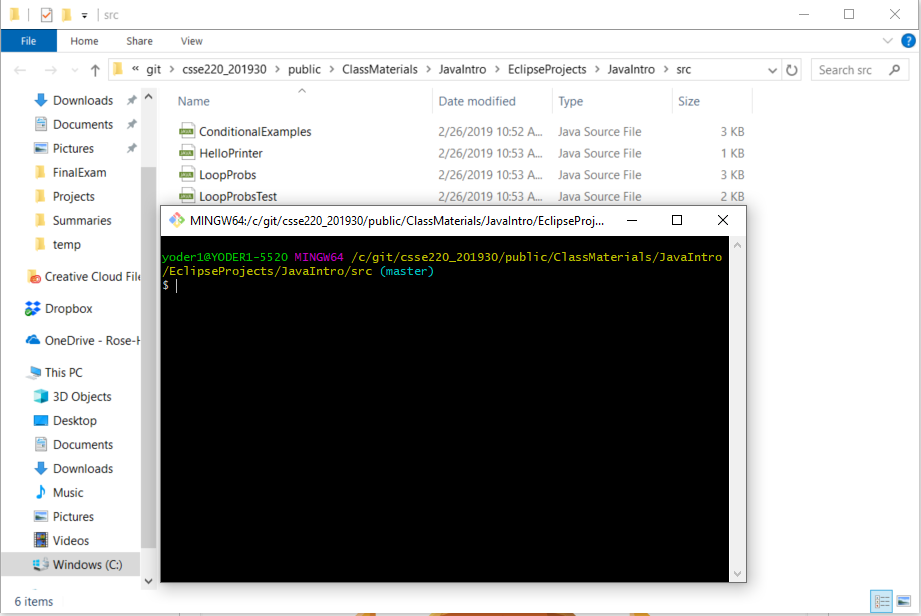
Which should open a window like this:

In the GitBash terminal type
git status
git pull origin master
If things are good, you should either see some new files downloaded, existing files updated, or the message “Already up to date.”
You may be asked to commit local changes before you do the git pull. Follow instructions in the How to commit and push your solutions section to do so. You can now import projects by following the instructions above.
Start Eclipse
Go to “File > Import” in the menu
Select “Git > Projects From Git” from the list of options and click “Next”
Select “Existing Local Repository”
Select your already cloned repo and click “Next”
Make sure import existing Eclipse projects is checked
Look for the projects you wish to import, make sure they are checked, then click “Next”
When you confirm that the projects you wish to import are checked, click “Finish”
If you see one or more new directories in the left pane it worked!
Start Eclipse
In the left pane, expand the project that you wish to submit to make sure this is the right project. Right click on the project name and select “Properties”.
In the Resources pane you will see the location on disk where the project is saved and you can click a button that will open that folder in Windows explorer:

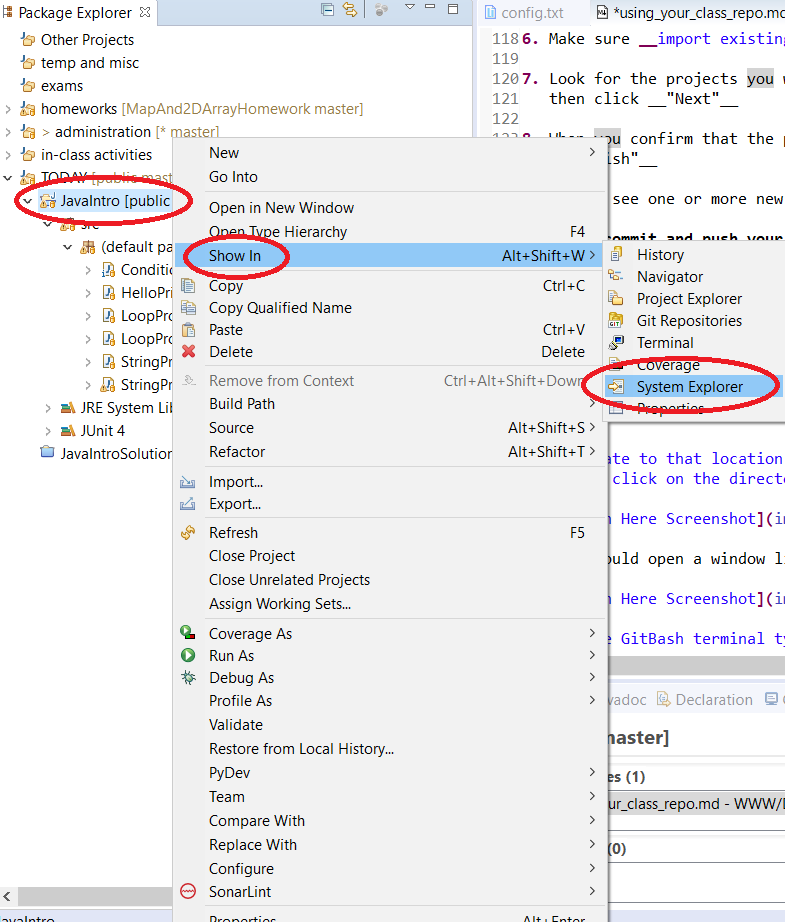
If the option is present you can also do the same by right clicking on the project and selecting Show In->System Explorer:

Using either option above or by navigate to that location using Windows Explorer, right click on the directory name and select “GitBash here”.

This should open a window like so:

In the GitBash terminal type. Hit ENTER after each command.
git pull origin masterAfter doing a git pull, if an editor window appears, it appears because Git is merging one or more files. The editor window is used to allow you the opportunity to edit the default message that is associated with a successful git merge. You can close the window by pressing the Esc key, then writing :wq or :wq!, then pressing the ENTER key.
git status
git add <filename>
if wish to submit individual files, OR
git status
git add .
if you wish to submit the entire project. It does no harm in submitting the entire project. You can submit as many times as you like before the assignment due date. As a matter of fact, we advise you to do so.
Type
git fetch -vIf things are good, it should say everything is update to date. If it downloads a change, you probably need to do a merge, but that’s beyond the scope of this document (Ask your instructor or a TA for help with merging files).
Type
git status You should see a summary that has all the files you want to submit in “Changes to be committed”. If it’s missing something, that’s probably because you forgot to `git add that file.
Type
git commit -m "some message you want associated with the commit"This should print a summary of how many things changed if it completes successfully.
Type
git push origin masterThis should show that it updated the master branch on the remote server, ada.csse.
Type
git statusVerify that there are no uncommitted changes that you wanted to commit and that it says the branch is up to date.
Login to ada.csse, click on the link to your individual project, and verify that your commit(s) on ada.csse are what you expect. NB: If you click on the text for a commit, you should be able to see the changes you have made.
If you prefer to run the above commands using the Eclipse graphical user interface, you can do so by following instructions posted at this location. Note however, there might be some limitations to what you can do. Additionally, learning to use Git from the command line will prove to be worthwhile in other contexts.