CSSE 220: Object-Oriented Software Development
SwingDemo

You will do this exercise by yourself, but be quick to ask questions of your instructor, student assistants and classmates as desired.

Goals

This exercise will let you:

  • Explore how to create a basic Graphical User Interface (GUI).
  • Learn to avoid some of the pitfalls in GUI creation.
  • See how Event-Driven Programming works.
  • Improve your skill at using an Application Programming Interface (API), in particular, the Swing API.

Grading rubric

For the first 6 stages, you receive 10 points if you implement that stage correctly. Each of the remaining stages is worth 20 points if implemented correctly.

Because this is an exploratory exercise, no documentation is required.

  • However, you should use good style, as usual, and your grade may be reduced if you do not do so.

Overview

You will implement this project in stages, testing at each stage to see if the project works correctly through that stage.

  1. Read the stages of your iterative enhancement plan (i.e., the subheadings of the next section).

Implement the project

Implement according to the following Iterative Enhancement Plan (IEP):

Stage 1. The 400 x 300 frame appears

  1. Open Eclipse.
  2. Create a new Java project called SwingDemo (spelled just like that — one word, capital S, capital D).
  3. Create a new class called Main with the usual main method.
  4. In main, construct a new SwingDemoFrame()
  5. Create a SwingDemoFrame class. (Use Quick Fix!) Make it extend JFrame.
  6. Create a no-parameter constructor in SwingDemoFrame that contains the following statements:
      this.setSize(new Dimension(400, 300));
      this.setDefaultCloseOperation(JFrame.EXIT_ON_CLOSE);
      this.setTitle("Swing Demo");
      this.setLayout(new FlowLayout());
      this.setVisible(true);
    

    • As usual, use Quick Fix to insert the required import   statements.
  7. Add your SwingDemo project to your individual repository for this course.
Stage 1: Frame appears

Test your understanding: Answer these questions to yourself, but be quick to discuss them with your instructor, a student assistant or a classmate if you are unsure of your answer.

  • What questions do you have about the above statements or the process so far?
  • Why are we constructing a class that extends JFrame instead of just constructing a JFrame and telling the constructed JFrame what to do? (The latter works, but ...)

Stage 2. A label that says "Hello" appears, along with buttons that say "Press me", "Press me too" and "Press me pretty please"

To get a component to appear, you need to construct it, then add it to the component on which it is to appear. So:

  1. In SwingDemoFrame's constructor, construct and add a new JLabel whose text is "Hello".
  2. Also construct and add a new JButton whose text is "Press me".
  3. Also construct and add a new JButton whose text is "Press me too".
  4. Also construct and add a new JButton whose text is "Press me pretty please".
  5. Commit your project to your individual repository at the end of this and EVERY stage.
Stage 1: Label and buttons appear on frame

Test your understanding:

  • Do you understand what add does? What kinds of things have an add method? What kinds of things can the add method take as its argument?
  • Do you understand how FlowLayout lays out components? (Try resizing the application after it starts, especially making it very narrow and then very wide.)
  • Do you understand why using a LayoutManager like FlowLayout is a good idea? (What is the alternative, and why is it worse?)
  • Do the buttons do anything yet when pressed? (Try them!)
  • What questions do you have about the process so far?

Stage 3. A red panel appears between the label and the buttons

  1. To your SwingDemoFrame, construct and add a new ColoredPanel, where ColoredPanel extends JPanel. Note:
    • This means that you create a new class called ColoredPanel in your project. Eclipse will offer to create the class for you (via Quick Fix) if you first construct an instance of it in your SwingDemoFrame.
    • We make this JPanel a subclass of its own because it will have enough code to justify being its own type of thing.
    • Later in this exercise the JButtons will have enough code to justify converting them to classes of their own too.
  2. The panel should set its preferred size to 200 x 200, using its setPreferredSize method.
    • Pitfall: Using the setSize method on a JPanel. Use setSize only for JFrame's.
  3. The panel should set its background color to red.
    • Hint: As usual, type this followed by a dot and examine your options. One will look very appropriate!
Red panel added between label and buttons

Test your understanding:

  • What determines the order in which objects appear in a component whose LayoutManager is a FlowLayout?
  • Do you understand how to use this followed by a dot to figure out how to get your components to look/behave as you wish?
  • What questions do you have about the process so far?

Stage 4. The label stays on top, the red panel in the center, and the buttons on the bottom, even when the frame is resized

  1. To layout the five components as desired for this stage (see pictures to the right), you will need to make two adjustments:

    1. Change the frame's LayoutManager to BorderLayout, and change the add statements to statements like this:
        this.add(BLAH, BorderLayout.PAGE_START);
      

      Run the program after making this adjustment (and not yet the following adjustment); you should see that only one of the buttons appears at the bottom.

    2. To make all three buttons appear at the bottom, you need to construct a new JPanel, add the buttons to the JPanel, and add the JPanel to the frame (using BorderLayout).
BorderLayout template Project converted to BorderLayout

Test your understanding:

  • Do you see how to organize your project into components within components (within components...), and how to implement that organization?
  • Do you understand how BorderLayout lays out components? (Try resizing the application after it starts.)
  • Note that BorderLayout changes the size of your ColoredPanel when the frame is resized, where FlowLayout retained the ColoredPanel's preferred size as long as it could fit in the frame.
    • That's just the way that BorderLayout works. If it is not what you want, then you don't want BorderLayout.
    • Try setting the preferred size of your JPanel for the buttons and seeing what happens when you resize the application after it starts.
  • Skim this Visual Guide to Layout Managers, just noting the six pictures it shows of layout managers.
    • Revisit this page when you want to do a more complicated layout in your projects.
  • What questions do you have about the process so far?

Stage 5. A circle appears inside the red panel

You can't paint within a frame, you need to paint inside a panel. This is done using the paintComponent method. So:

  1. Create a method in ColoredPanel with the signature:
      public void paintComponent(Graphics graphicsObject)
    
  2. The first line of the paintComponent method should ALWAYS be a call to JPanel's   paintComponent(graphicsObject) method. (How?)
    • Pitfall: Omitting this call to the superclass' paintComponent. Nothing shows up when you make this hard-to-spot error.
    • Pitfall: Getting the signature of the overridden paintComponent wrong. Again, nothing shows up when you make this hard-to-spot error.
  3. Next, ask the graphicsObject to draw a circle (oval). Any reasonable size and location is fine.
  4. BONUS: how could you get it to show up in the middle of the panel, even when the application is resized?
A circle appears on the red panel

Stage 6. Another shape appears in the red panel

  1. Draw or fill at least one other type of shape on the panel, with the color of that shape being BLUE.
    • To set the color, try a dot after graphicsObject and see what appears, as usual.
Another shape (here, a filled blue rectangle) appears on the red panel

Stage 7. Clicking the first button causes the background color of the panel to toggle between red and green

For this, you will add an ActionListener:

  • The component that will respond to the event (call it responder) must implement ActionListener.
  • The component that will listen for the event (call it listener) must add the ActionListener like this:
    listener.addActionListener(responder)

Example 1: a panel responds to a button's clicks:

  this.button.addActionListener(this)


Example 2: A button responds to its own mouse clicks:

this.addActionListener(this)


Rule of thumb: A button should respond to its own button presses. Following that rule of thumb:

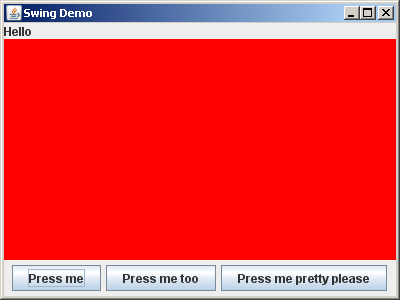
  1. Convert your "Press me" button to a class that extends JButton, instead of a JButton itself.
    • We usually choose names that end in "Button" for JButton classes, e.g. something like TogglePanelColorButton here.
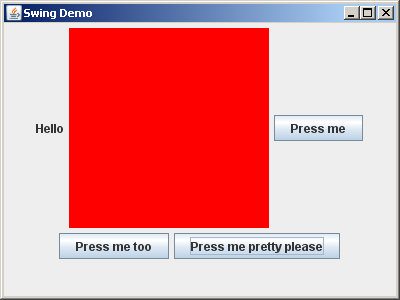
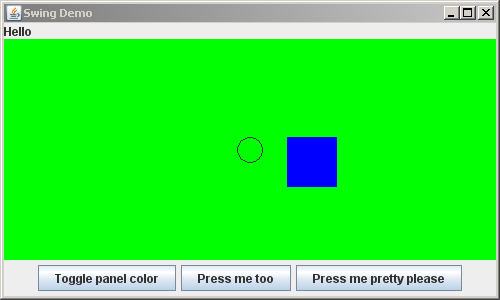
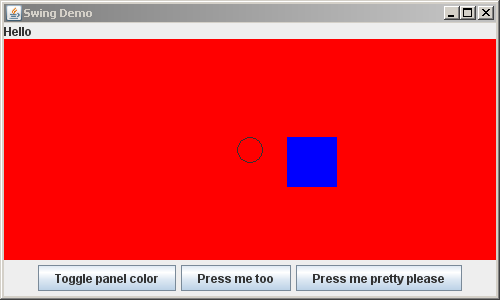
  2. Change the button's text to be "Toggle panel color" instead of "Press me".
  3. Change the frame to be 500 x 300 instead of 400 x 300, to accommodate the fact that the button text is increased. (Try it without this change and note that the third button is offscreen.)
  4. Make the button respond to its own button-press. When pressed, it should ask the ColoredPanel to toggle its background color between red and green.
    • Perhaps you should implement a toggleColor method in your ColoredPanel class.
    • Since the button asks the ColoredPanel to do something, the button must “have” the ColoredPanel. The usual way to implement this is to pass the ColoredPanel to the button in the button's constructor.

You will probably have questions in doing the above; ask away (instructor, student assistants or classmates) — it's OK!

Red panel has toggled its background color to green Green panel has toggled its background color to red

Test your understanding:

  • Do you see how to have listeners and responders, and how to relate them?
  • What types of object can be listeners?
  • What types of object can be responders?
  • Do you see that if we want to follow the rule of thumb and have the button respond to its own button-press, then we must implement the button has-a ColoredPanel relationship?
  • Do you see the general approach for implementing has-a relationships among objects in a GUI?
  • What questions do you have about the process so far?

Stage 8. Clicking the second button causes the label to toggle between "Hello" and "Goodbye"

  1. Proceed much as you did in the previous stage, but implementing the second button this time. In particular:
    • Convert your "Press me too" button to a class that extends JButton, instead of a JButton itself.
    • Change the button's text to be "Toggle label" instead of "Press me too".
    • Make the button respond to its own button-press. When pressed, it should cause the label on the frame to toggle between "Hello" and "Goodbye"

Frame has toggled the label on it to Goodbye Frame has toggled the label on it to Hello

Test your understanding:

  • Do you see the general pattern for responding to button-presses?
  • What questions do you have about the process so far?

Stage 9. Clicking the third button causes the circle to move 10 units left

In this state, you will implement a crude form of animation — repeatedly pressing the third button moves the circle.

  1. Proceed much as you did in the previous stages, but implementing the third button this time. In particular:
    • Convert your "Press me pretty please" button to a class that extends JButton, instead of a JButton itself.
    • Change the button's text to be "Move circle" instead of "Press me pretty please".
    • Make the button respond to its own button-press. When pressed, the circle on the red/green panel should move 10 units left.
      • Note: When the button tells the panel to move its circle, the button must follow up by asking the panel to repaint itself.
        • Pitfall: Forgetting to ask the object to repaint. You can spot this error by minimizing-and-restoring the application, which forces a repaint; if the object is redrawn properly now (here, the circle is moved), then you know that you forgot to repaint or otherwise update the object.

Circle has moved left 10 units Circle has moved left 100 units

Test your understanding:

  • Do you see the general pattern for responding to button-presses?
  • What questions do you have about the process so far?

Stage 10. Clicking inside the red/green panel moves the circle to the mouse click

For this, you will add an MouseListener:

  • The component that will respond to the event (call it responder) must implement MouseListener.
  • The component that will listen for the event (call it listener) must add the MouseListener like this:
    listener.addMouseListener(responder)

  1. Make the ColoredPanel implement MouseListener.
  2. Make the ColoredPanel add itself as a MouseListener.
  3. One of the required methods when you implement a MouseListener is mouseClicked. Implement this method, making it change the circle's position (and do a repaint). You can leave the 4 other MouseListener methods in their do-nothing implementations.
Circle has moved to mouse

Test your understanding:

  • Do you see the general pattern for responding to mouse-presses? Do you see that it is very similar to the pattern for responding to button-presses?
  • What questions do you have about the process so far?

Stage 11. Something else novel appears on the frame

  1. Skim this wonderful Visual Guide to Swing Components, just noting the wide variety of components that you can use in Swing.
  2. Add some Swing component (other than JButton or JPanel) from the above link to the right-hand-side of your frame.
    • Your new component does NOT have to do anything; it just has to be plain that it is not a JButton or JPanel.
A JSlider has been added to the right-hand-side of the frame

In your forthcoming projects you will want to learn more about Swing. The following tutorials from the Java Tutorials are excellent:

Commit your project to your individual repository when you are done.